Azure Free Account | A Step-By-Step Guide For Beginners
Microsoft Azure Free Account offers USD 200 credits in your Azure account for 30 days. You can utilize any service for the next 30 days at USD 200. Apart from that, it offers some popular services free for 12 months and more than 25 services free for a lifetime.
Steps to Register for Azure Free Trial Account
There are straightforward steps to register for Azure Free Account. Let’s begin with the registration process.
Step 1) Visit the Azure Home Page.
Step 2) Click on Free Account as shown in the image. 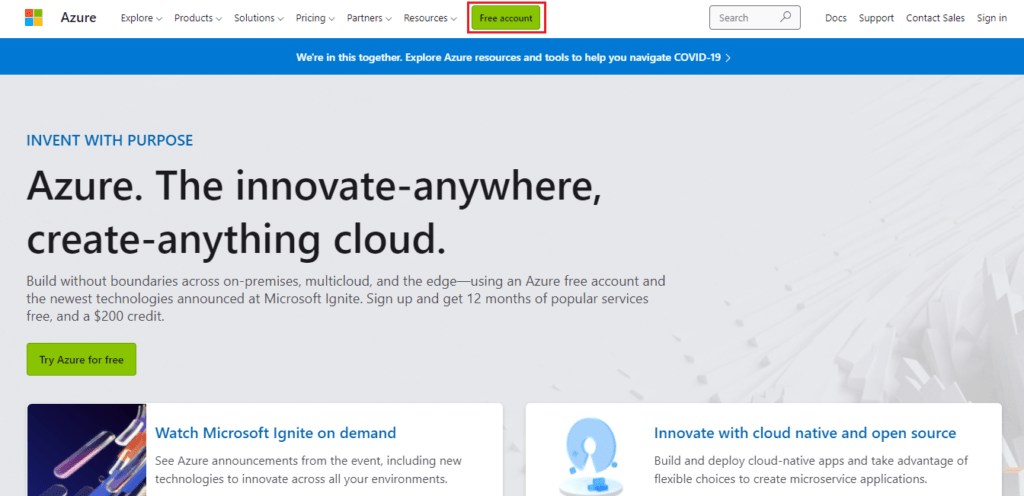
Step 3) Click on Start Free.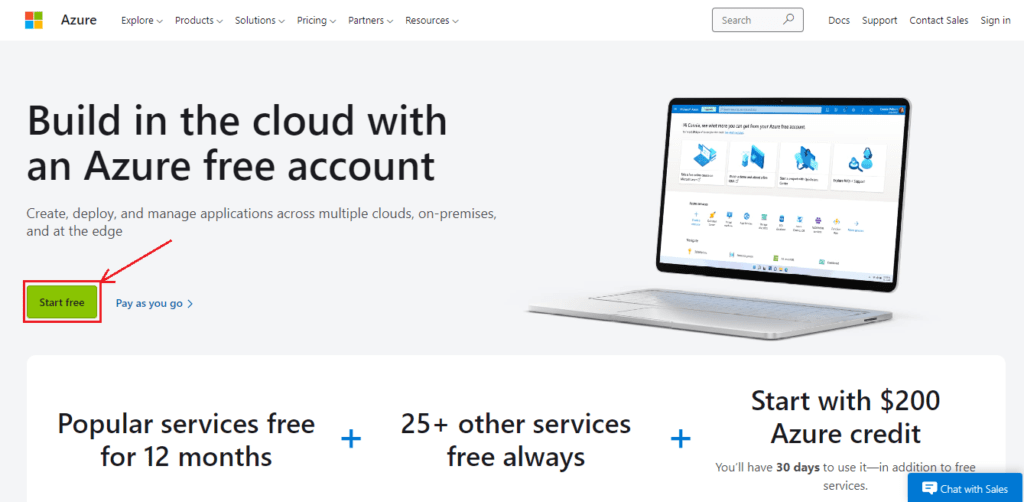
Step 4) Sign in using an email address or create a new one.

Step 5) Now enter the following details.
- Country/Region
- Your Name
- Email Address
- Mobile Number
- And verify the mobile number
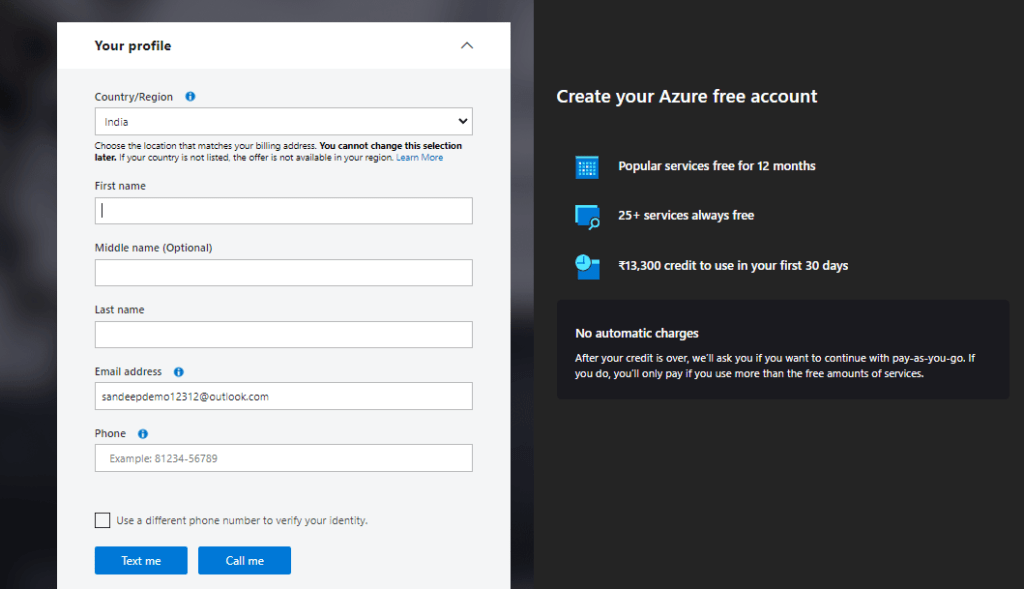
- After the verification process, enter the organization name (you can type any name).
- Now accept the terms and conditions. Click on Next.
- Enter your Credit card details. Make sure you have a VISA/Master Credit Card with international payments enabled.
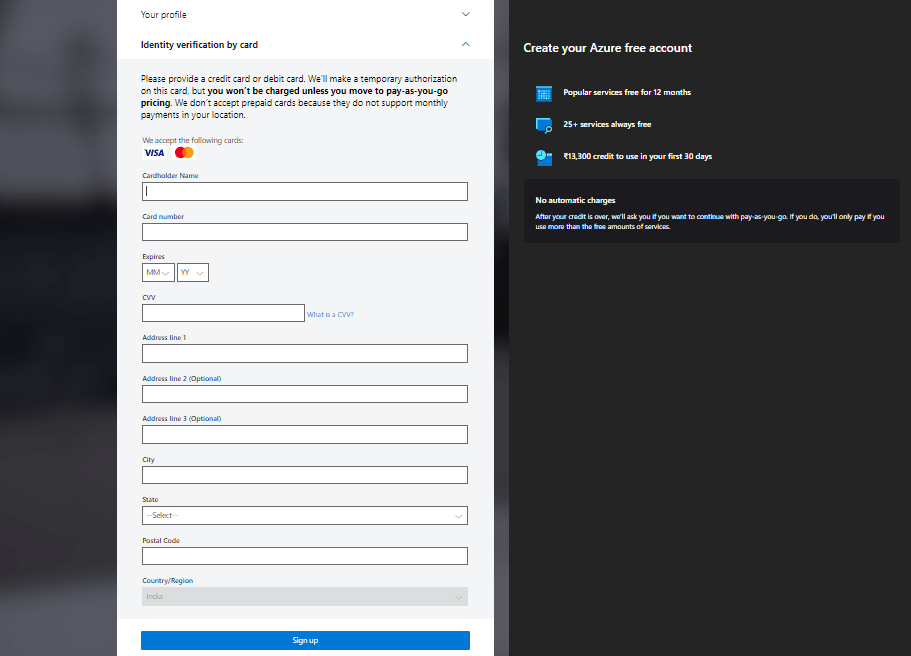
Step 6) Now Click on Sign up.
There you go, you have successfully created a Microsoft Azure Free Account with USD200 credits. Click on the portal on the top right corner and now you can use Azure Portal.
Note: If you are done with your free credit amount of USD200, you can opt for the pay-as-you-go subscription. You will be charged based on the services you will use.

Note: You can only create one free trial account using a single credit card. If you are a student, you can register using your college valid email id.
Steps to Cancel your Azure Subscription
Alright! Now if you decide somehow to cancel your Microsoft Azure Account Subscription. Here are the steps to follow:
Step 1) Go to the Azure portal account.
Step 2) Select your subscription and click on cancel subscription. 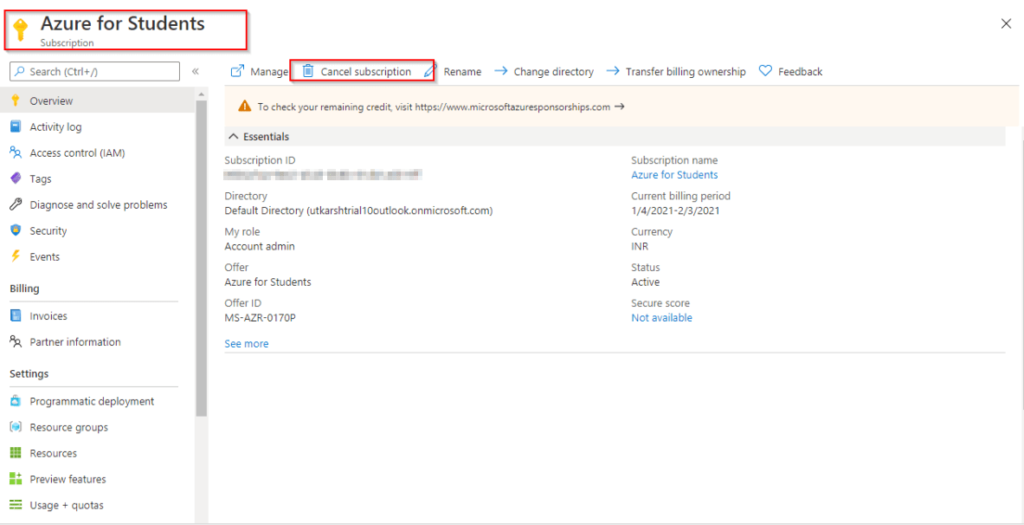
Step 3) Confirm the subscription and click on cancel subscription. 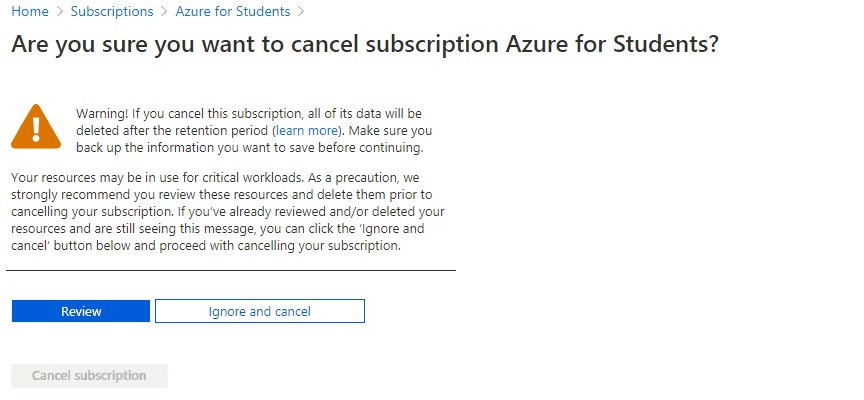 Do Read: What is Azure?
Comments
Post a Comment